Welcome

Welcome to my Blog and please have a look around. I want to share some of my projects with you and hopfully they will inspire you to try something new in your art world.
Please fee free to leave a comment - I love to hear what you have to say.

The above picture is of my kitty Baxter, or better known as Mr. Boo, as he is a big scaredy cat.

Saturday, December 5, 2009

Advent ATC's Day Five

This is the ATC that I did for Day 5

and this is the one I got from Dawn.

Friday, December 4, 2009

Christmas Card 2009

Well, I have started doing a few cards for the holiday season and I thought I would put one up this morning before I left for work. Working ten hour days just leaves me drained at the end of the day and since I have a few minutes now before I leave for work I thought I would share one of the cards I did using paper from Graphic 45.

This picture came from one of the Frames on the Christmas Past Frame sheet. I know it's hard to tell, but I used Rock Candy Crackle Paint over the whole picture - it gives it a kind of shinny and crackle vintage look that I really like. I placed that on a green cardstock that has a bit of a stripe in it. I added the lace and then on top of that I used Glitz Stickles in Champagne. I
added the red and gold ribbon to the top and bottom and to finish off I put on the greeting. I am really happy with the way this card turned out.
Thanks for stopping by and I hope I have passed on a bit of inspiration to you this morning. Have a great day!!

Advent ATC's Day Four


Here is the Advent ATC I made for Day Four

This is the card that I got from Cheryl


Thursday, December 3, 2009

Advent ATC's Day Three

This is the Day Three ATC that I made and

here is the Day Three that I received from Andrea

One Hour Of Power Challenge - Wishes


This week at OPH I have set the theme as "Wishes" and I have made an ATC called "Wish". To me the image looks like she is wishing for something as she overlooks the sea. The W is made from GrungeBoard painted with a Paint Dabber in Pink Sherbet and sprinkled with glitter. The image is from Altered Pages and I matted it with a green cardstock, my base is navy cardstock. I added the buttons to accent the colors I used and the word is done with my Dymo labeler.


Wednesday, December 2, 2009

Advent ATC's Day Two


This was the Day Two ATC that I made.


Here is Day Two that I received from Michelle.

Tuesday, December 1, 2009

Advent ATC's Day One

I have done a swap on Circle of Friends and we did an Advent Calender using ATC Cards. I am going to try and post each days cards that I made and the ones that I received back in the trade. So here we will start with December 1st - Day One


This was my Day One


This is Day one that I received from Janice.


Saturday, November 28, 2009

One Powerful Hour Challenge Dancing/Dance

This week at OPH the theme in Dancing/Dance and I have this tag that I had made some time ago so I thought I would share it with everyone. The funny thing is my image ended up being the same one that Caroline used - hope you don't mind Caroline. LOL!!

I really like making tags and when I found this image on a collage sheet from Altered Pages and I thought of dancing the night away that it would be perfect for a tag.
The background is done using a border mask from Tim Holtz and distressed inks in Broken China and Faded Jeans, once I removed the the mask I used Tea Dyed all over and Walnut Stain on the edges. I added Stickles glitter glue to the dress and the crystals are colored with Wild Plum Alcohol ink. The buttons have a bit of Alcohol ink in Cranberry, Stream and Gold.

Thursday, November 26, 2009

November Swap COF

For the November Swap at the Circle of Friends the hostess sent us some stamps and we were to use them to create anything that inspired us. We received two sets of clear stamps - one with two flowers and one with butterflies and a bird, some of my favorite images. But I must say I was really challenged with this project and it took me almost three weeks of looking at the stamps and looking at the paper I wanted to use to get inspired. It finally all came together and here is the final result - a small hanging inspirational card.

For the base card I used this great paper I found at Reddi Arts, a shop
here in Jacksonville, FL, it is a recycled brown Rough Sketch paper, but I wanted to find a way to use it in this project. I used Distressed Ink in Spiced Marmalade all around the edges of each card and a bit over the whole piece. Using a watermark ink I stamped the flourish in the background and then added the saying and bird, both from Tim Holtz clear stamp collection Artful Flight using Pearlescent Chocolate Brilliance by Tsukineko. I glued the art piece to an really pretty orange cardstock to make it a little more sturdy and then added the little corner pearls from Basic Grey.

For the flower I stamped it on Grungepaper and cut them all out, added Distressed inks in a variety of different colors - for this one I used Faded Denim and Mustard Seed in the center. Because the Grungepaper is soflexible I used a toothpick and wrapped each petal to give it a bit of curled dimension. I added Distressed Stickles in the same colors on the flower and at the edges of the petals I used Picket Fence Stickles. To glue the flower I only used glue dots in the center so that the petals are free and can be "fluffed" to add even more dimension to the piece. Here's a close up of the flower.

Thanks for stopping by and I hope I have inspired you to create,


Thursday, November 19, 2009

OPH Challenge

This week is my debut as a team member of the One Powerful Hour Challenge site. Thank you Caroline for bringing me on to your team, I think this will be lots of fun and a great experience. Hope you all will enjoy my Themes and I can't wait to see what creative art you make.

This week I have chosen Telephone as my theme. I got the inspiration for the Telephone theme from a sheet of Graphic 45 paper called Classy Correspondence. I love the old telephones and this one just seemed to speak to me. For the background I scanned the original sheet of paper and then faded it out and changed the coloring to be a little more vintage. I added some Distressed Ink in Antique Linen and put Black Soot on all the edges. I enlarged the phone, cut it out and applied Distressed Stickles in Tarnished Brass. For the phone cord I used wire and wrapped it around a toothpick and then attached it to the phone. The word Phone is spelled out using Stencil Type from Tim Holtz, yep I had to get him in there one way or another since I am such a huge fan. I stamped on the swirls in a chocolate ink and added dots of Distressed Stickles in Antique Bronze.
Thanks for stopping by and I hope I have inspired you to be creative.

Thursday, November 5, 2009

Baby Shower Tag


There was a Baby Shower at work today and since I Jessica and I often talk with each other I got her a little something and I made this little tag for the gift bag. I turned out just as I envisioned and everyone liked it.


I used Tea Dyed Distressed ink over the whole tag and then added Worn Lipstick and Shabby Shutters in some areas, I used the Flourish Mask from Tim Holtz and more Worn Lipstick, Dusty Concord and Tea Dyed around the mask. The Grungeboard letters I used are covered in Pink Stickles and a little Worn Lipstick Distressed Stickles. I added a little pink bling and a
baby footprint. Topped it all off with pink and brown ribbons.


Sunday, October 25, 2009

Oct. Monthly Mailer and One Powerful Hour


I mailed out my Monthly Mailer on Thursday and I wanted to add it to my blog so here I go. This months theme was Halloween and I did this tag. One Powerful Hour is also doing a Halloween theme and I thought this would be perfect. For the background of the tag I used Distressed Inks in Tea Dyed and Spiced Marmalade and then once I scruffed up the edges I used Walnut Stain on all the edges. On top of that I used Crackle Paint in Old Paper. The pumpkin is from Grungeboard and I used Distressed Stickles in Spiced Marmalade to lots of sparkle to the project. I stamped Happy Haunting the the Bats with black Archival ink. I took a few of the jump rings and linked them together to form a small chain and I attached that with a Trinket Pin. I had a couple of sparkling bats and a moon brad and I attached them to the top of the tag. I finished off with a cute Halloween ribbon. "BOO" and I hope you all have a fun Halloween!!

Wednesday, October 21, 2009

Breast Cancer Mini Quilt


Last week I made this Breast Cancer Awareness mini quilt and gave it to a friend. This is only my second time to create something like this and it was so much fun to work on. It is made from squares and rectangles of Grungepaper - a Tim Holtz product, of course.

I have used many different techniques on this from stamping, embossing with heat and with my Cuttlebug, sewing and painting to name a few. Once I finished all the tiles I glued them to a heavy watercolor paper and attached magnets. You could also add a ribbon at the top to hang the little quilt.

Thanks for taking a look.


New Tattoo


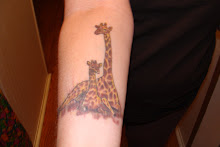
A few weeks ago I finally got my 5th tattoo and I wanted to share it now that it's all healed and looking good. This is Mr. Boo, he is one of my two year old kitties and I had him put on my right calf. I went to a Tattoo Convention here in town and found a great artist from TN by the name of Eric. Just talking to him he was very excited about doing the kitty and I knew he would go a fabulous job, and he did!!!

Mr. Boo
Mr. Boos is a very shy boy so hence the name. When we got him we named him Baxter, but Boo is much more suited to him.

Thanks for stopping by to have a look around - have a great day!!

Sunday, October 4, 2009

A Friends Birthday Card


This week Ricky at work had a birthday and I wanted to post and let you what I came up with for this one. Ricky loves planes and history and as I was looking through some Graphic 45 papers that I have I found this tag of a blueprint of The Spirit of St. Louis and thought - perfect. So I scanned it, enhanced it and made it a good size for a card and then went looking for an original picture of the plane. There's the card I finally got put together on Thursday night, his birthday was on Friday.


I found this great picture of the plane with the pilot and I printed it on a piece of Sticky Back Canvas and then I added a little Distressed Ink in Antique Linen. I know It's hard to see the the background
paper I used is sky and clouds, it really did look good together. I used the Antique Linen around the edges of the card also. Then I added the name and a few stars with Distressed Stickles on them and this is how it all came together. Oh by the way he really liked the card - YEAH!!


Saturday, September 26, 2009

Circle Of Friends Sept ATC Swap

Sorry I haven't updated in so long - between being sick for a week and loads of work at the office I haven't been in the craft room much over the last few weeks. I'm hoping to get a few things worked on over the week end and getting a few more things posted for you to see.

For September and and October at COF we are doing an Advent ATC Swap. Numbers 1 - 12 are due by the end of Sept and numbers 13 - 25 are due at the end of October. We are all using the same set of papers from Basic Gray - Wassail, but from there you can make them completely your own. I sent off my Sept set last week and I have been working on the second set for Oct in
between working on a few other projects - I'll get to those in another post. I thought I would post a few of them over the next couple of posts.


For number 1 I used a Mask from Tim Holtz and Distressed Ink in Tea Dyed for the background. The Santa is an image from Altered Pages from a collage sheet called Glass Slides Christmas. I added Distressed Stickles in Fire Brick to the background for a little added sparkle. I stamped the number One and added a button to finish the piece.


For number 2 I used a printed background, a couple of fabric stars, a one inch Fragment, again from Tim's collection and a really pretty green jewel brad. I found the number 2 tag and paired it with the brad. Under the Fragment I used a Christmas Greetings image from Altered Pages from a collage sheet called Inches Christmas


For my third ATC I used a Grungboard number 3, three Christmas Trees and a cute red and green ribbon and bow. I used Distressed Ink in Old Paper around the edges of the card and just a bit on the card to give a more of an aged look. The 3 is painted with a shinny paint and I added three green jewels for that added sparkle. I also added a little green Stickles in green to the trees.

Well, there you have my first three cards - I will add more in the next post and I promise it won't be such a long wait for that one. Thanks for stopping by - I love sharing my Art projects with you all and I hope I can inspire you to go make some Art!!

Sunday, August 23, 2009

ATT Monthly Mailer

Over at All things Tim we are doing a monthly mailing to a new friend and to share our artwork. This month I am sending to Lori and I have made a tag, which is usually what I do as I so love to make them.

For this tag I used a mask and Tea Dyed Distress Ink for the background. I added a butterfly stamp in the middle and then masking that I stamped a Script stamp in Olive Green. I painted the butterflies using Alcohol inks and then used three square Fragments. The large pink butterfly is made of Grungepaper and was painted with Worn Lipstick Crackle Paint. I added a bit of Fired Brick Distressed Ink to the edges and pearls & crystals to the body of the butterfly. The word Dreams was embossed on a black sandable paper and I added Glossy Accents to make them look more like letter bubbles. I added a bit of vintage paper and a little green ribbon at the bottom of the tag.

I was looking at my blog and realized that I forgot to add the Monthly Mailer for July so I'm going to add that here also. This tag was done for Liz.

For this tag I did the background using Tea Dyed and Worn Lipstick for the background, then I stamped one side using a Dictionary stamp and black ink. For the lower right corner I embossed script with my Cuttlebug. the wings are embossed using Weathered Wood embossing powder. I added the saying, which is embossed in red and a Philosophy tag for interest. The edges of the age are done with Walnut Distressed Ink.


Tuesday, August 18, 2009

Page Swap with All Things Tim

I have joined a Page Swap with my online group All Things Tim. Instead of passing around books which can take over a year to get back, 20 of us are creating pages involving lots of "Tim Stuff" and then sending them to the host. She, in turn, will then send each of us 20 different pages and we can put them together as a book in any way that pleases each of us. I thought this was a great idea - we will all get lots of wonderful pages in lots of different styles. The theme for the pages was Vintage, but you could do any kind of page you wanted. I have a couple of Tim's new stamp sets and one of them is The Big Top so I used the Circus as the main part of my project. I have also used the set called Fabulous Flourishes in the background.

The pages are 6 x 6 and I started with a heavy watercolor paper that I sprayed with a lite
green Glimmer Mist. Once that is dry I added Distressed Ink in Tea Dyed to get rid of the bright white, then I added bits of color using Distressed Inks in Mustard Seed, Marmalade and Faded Jeans. On top of that I added some Alcohol Inks in Lemonade, Pink Sherbet and Pool using Blending Solution to blend them together. Once everything is dry I put on a very thin coat of Brushed Bronze Crackle Paint, as soon as I get that on I used a Flourish stamp on the wet paint which gives you a reversed stamped look as it takes the paint away. When that is dry I stamped the clowns, and the word Cirque which is stamped in red and black. Using Watermark ink I stamped the number board and embossed it with Fired Brick embossing powder. I added a rub on clock and gears and spinners. The circus poster is printed on a sticky back canvas and I added Distressed Ink in Tea Dyed to add age.

Thanks for stopping by to take a look and I would love to see your comments.


Saturday, August 8, 2009

Birthday Card

We celebrate birthdays in my little accounting world at work in a big way. There's only 7 of us let now, over the last few years the number has been going down. When I started there were 12 in the department and over time we have been slimmed down to the great group that we now have. Anyway, for every one's birthday we decorate their cubical in a big way, balloons and lots of party stuff - want to make sure everyone knows it's their birthday. LOL!! Then we all go out for lunch, at the birthday person's choice and at 3PM we always have some kind of birthday desert. Makes for a fun day. Here is the card I did for Debbie this week:

The background is really more of a green, don't know why it scanned in this color, but anyway I used my wonderful Cuttlebug I embossed some sandable paper with the Birthday Embossing Folder. After sanding to bring out the embossed words, I then also added a bit of Twinkling H2O paint to a few of the debossed words for added color. I like the way that worked! I added some Distressed Ink in Tea Dyed around the edges and then attached to the background with pop dots. I just wanted it to pop out a bit. I added the silk flowers with jewels for the centers for a finishing touch.

Thanks for stopping by and be sure to have a look at some of my other projects. I hope they give you some inspiration for your next project.

Please feel free to jot down a comment, I'd love to hear your feed back.


Saturday, August 1, 2009

August COF Swap

Well, for once I am way ahead of myself for the Monthly Swap we do at Circle of Friends. This month the challenge was to make an arch using a theme of Medieval. I have to say this is one of my favorite projects and I had so much fun putting it all together.

For the arch it's self I used Grungepaper and embossed it with an embossing folder that looks like Steel Plate, I thought that would give the look of a shield. I painted the arch with a metallic silver and used a bit of gold and Black Soot over that just to give a more aged look. The knight is printed on paper and painted with H2O's, for the horse I used a brown Distressed Ink. I added some torn papers and then did all the bead work along the side.